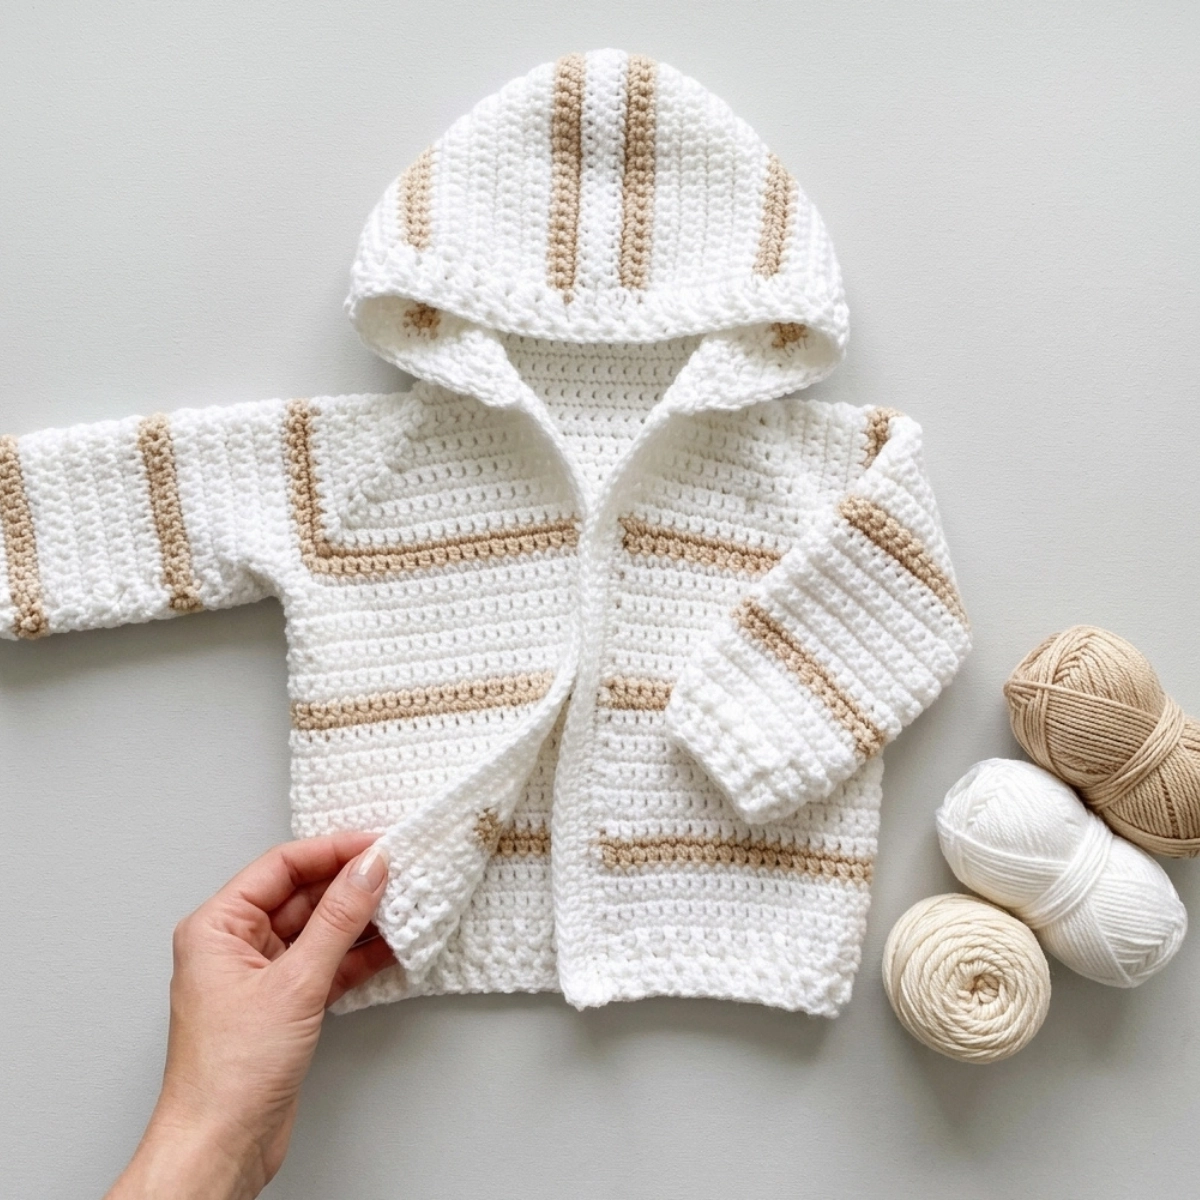
I made this single crochet baby sweater using cotton yarn and a simple stripe detail, and it turned out so sweet. If you have made a cardigan before, this single crochet baby sweater pattern will feel familiar to you. If you are a bold beginner who has never made one, sometimes you just have to jump into the pool and see how it goes.
Materials and Tools
- Hobby Lobby I Love This Cotton (100% cotton, 3.5 oz / 180 yds)
- 2 skeins White
- 1 skein Antique Cream
- Size H / 5.00mm crochet hook
- Tapestry needle
- Scissors
- Stitch markers
Gauge and Finished Size
This pattern does not include a specific gauge. The finished baby sweater is approximately a 3-6 month size.
Pattern Notes
This pattern is best suited for crocheters who have made a sweater or cardigan before. The instructions assume some familiarity with sweater construction, like forming armholes and working sleeves in the round. That said, if you are a newer crocheter who feels confident, give it a try. Some things make more sense once you are actually working through them.
The sweater is worked from the top down, starting with the yoke. The bodice and sleeves follow, with a hood and placket added at the end. The stripe detail uses Antique Cream as the contrast color throughout.
Abbreviations
- SC: single crochet
- SC2TOG: single crochet two together (decrease)
- FPSC: front post single crochet
- BPSC: back post single crochet
- CH: chain
- ST: stitch
Pattern Instructions
Yoke
Chain 44.
Lay the chain flat in front of you. Starting from the end closest to the hook, count out ten chains and place a stitch marker in that tenth chain. Then place stitch markers in the 16th chain, the 29th chain, and the 35th chain. This saves you from having to count again later.
Starting in the second chain from the hook, work a SC and continue working SC across until you reach the first stitch marker. Work 3 SC into that marked chain. Continue with SC to the next marker and work 3 SC into that space as well. Repeat this at each of the four marked corners. When you reach the end of the chain, chain 1 and turn.
On the next row, SC across. When your stitch markers are removed, look for the middle SC of each three-stitch corner group. That is your new corner. Work 3 SC into each corner stitch every row to continue the increases. If it helps, keep placing stitch markers in those center stitches.
Continue increasing at each corner for a total of 9 rows. Change to Antique Cream for rows 10 and 11. On row 12, change back to White.
Forming the Armholes
After row 12, your yoke is a square shape with an opening at the front. Place a stitch marker in the middle SC of each of the four corners.
To form the first armhole, SC to the first marked corner stitch, then chain 3. Skip the stitches in between and SC into the next marked corner stitch. Continue SC across the back, then repeat on the other side to form the second armhole. SC to the end of the row to close the front.
Bodice
Work SC back and forth across the bodice. At the end of each row, chain 1 and turn. Follow this stripe sequence: 9 rows White, 2 rows Antique Cream, 9 rows White, 2 rows Antique Cream, then 6 rows White. For the final 3 rows, alternate FPSC and BPSC across to create a subtle textured ribbing at the hem.
Sleeves
Join yarn into the middle of the chain-3 armhole space. Before you start crocheting, look at the direction the SC stitches are pointing. You want to work in the opposite direction, just as if you had chained 1 and turned. Think of each stitch top as a little V shape. If the small part of the V is pointing left, that means you are going the correct direction.
SC2TOG the first two spaces (one chain space and one SC space). SC around the armhole opening. When you reach the last stitch of the row below and the final chain space, SC2TOG those together as well. Aim for approximately 30 stitches around. Adjust with a small increase or decrease as needed.
Work the sleeves in the same stripe sequence as the bodice: 9 rows White, 2 rows Antique Cream. For the final 3 rows, alternate FPSC and BPSC to form the cuff ribbing. Repeat for the second sleeve.
Edging
Before adding the hood, work one row of SC around the entire sweater as an edge. Start at the front bottom and work one SC per row up the right side, across the neck, and down the left side.
If you prefer a simple cardigan without a hood, stop here. Work two more rows of SC up and down the left front edge to create the button placket, attach your buttons, and you are done.
Hood
Starting two stitches in from both sides of the neck opening, work SC across the neck in the same stripe pattern (9 rows White, 2 rows Antique Cream). Continue for 35 rows total.
Seam the top of the hood closed with a row of SC. Then starting at the front edge of the hood, work 3 rows of alternating FPSC and BPSC, slip stitching to keep the edging even with the front of the bodice. Slip stitch twice into the last space to finish neatly.
Placket
Work SC down and back the left front edge two times and fasten off. This creates the button band. Add buttons once you have decided on your final look.
Tips
Work at an even tension throughout. Cotton yarn does not have much stretch, so it is important to keep your stitches consistent from the yoke to the hem.
If you struggle to find the middle stitch of a three-stitch corner, keep your stitch markers in place the whole time. There is no rule that says you have to remove them.
When joining the yarn for the sleeves, take a moment to study the direction of your stitches before you start. Getting this right means the sleeve texture will match the bodice.
If the hood feels a little tricky to finish, zoom in on a photo of the finished sweater to see how the edging lines up with the front panels. Sometimes a visual helps more than written instructions.
Cotton yarn is a great choice for baby items. It is breathable, easy to wash, and soft against delicate skin.
Frequently Asked Questions
What size does this single crochet baby sweater fit? This sweater is sized for approximately 3-6 months. You can adjust the stitch count in the yoke and add or remove rows in the bodice and sleeves to size it up or down.
What type of yarn is used for this baby sweater? The pattern uses Hobby Lobby I Love This Cotton, which is a 100% cotton worsted weight yarn. You need 2 skeins of White and 1 skein of Antique Cream. Any comparable worsted weight cotton yarn would work as a substitute.
Is this single crochet baby sweater pattern good for beginners? It is recommended for crocheters who have some experience making sweaters or cardigans. The construction involves working increases for the yoke, forming armholes, and picking up stitches for the sleeves. If you are a confident beginner, it is still worth trying. Working through it is often the best way to learn.
What hook size do I need for this baby sweater? The pattern calls for a size H / 5.00mm crochet hook. Since there is no set gauge, your finished size may vary slightly depending on your tension.
Can I make this sweater without the hood? Yes. After working the edging row around the sweater, you can skip the hood entirely. Just work two rows of SC along the left front edge for the button placket, add your buttons, and the cardigan is finished.
How do I create the ribbed cuffs and hem on this baby sweater? The ribbing effect comes from alternating front post single crochet (FPSC) and back post single crochet (BPSC) across the last three rows of the bodice, sleeves, and hood border. This creates a stretchy, textured finish.
I share daily crochet inspiration on Pinterest. Save this article to your Pinterest boards so you can come back to it whenever you are ready to start.