I know, I know. Caterpillars aren’t exactly everyone’s favorite creatures. But I promise you, this little guy is different. The moment I finished his face and set him on the table, I literally said “aww” out loud. To a crocheted bug. And I’m not even a bug person.
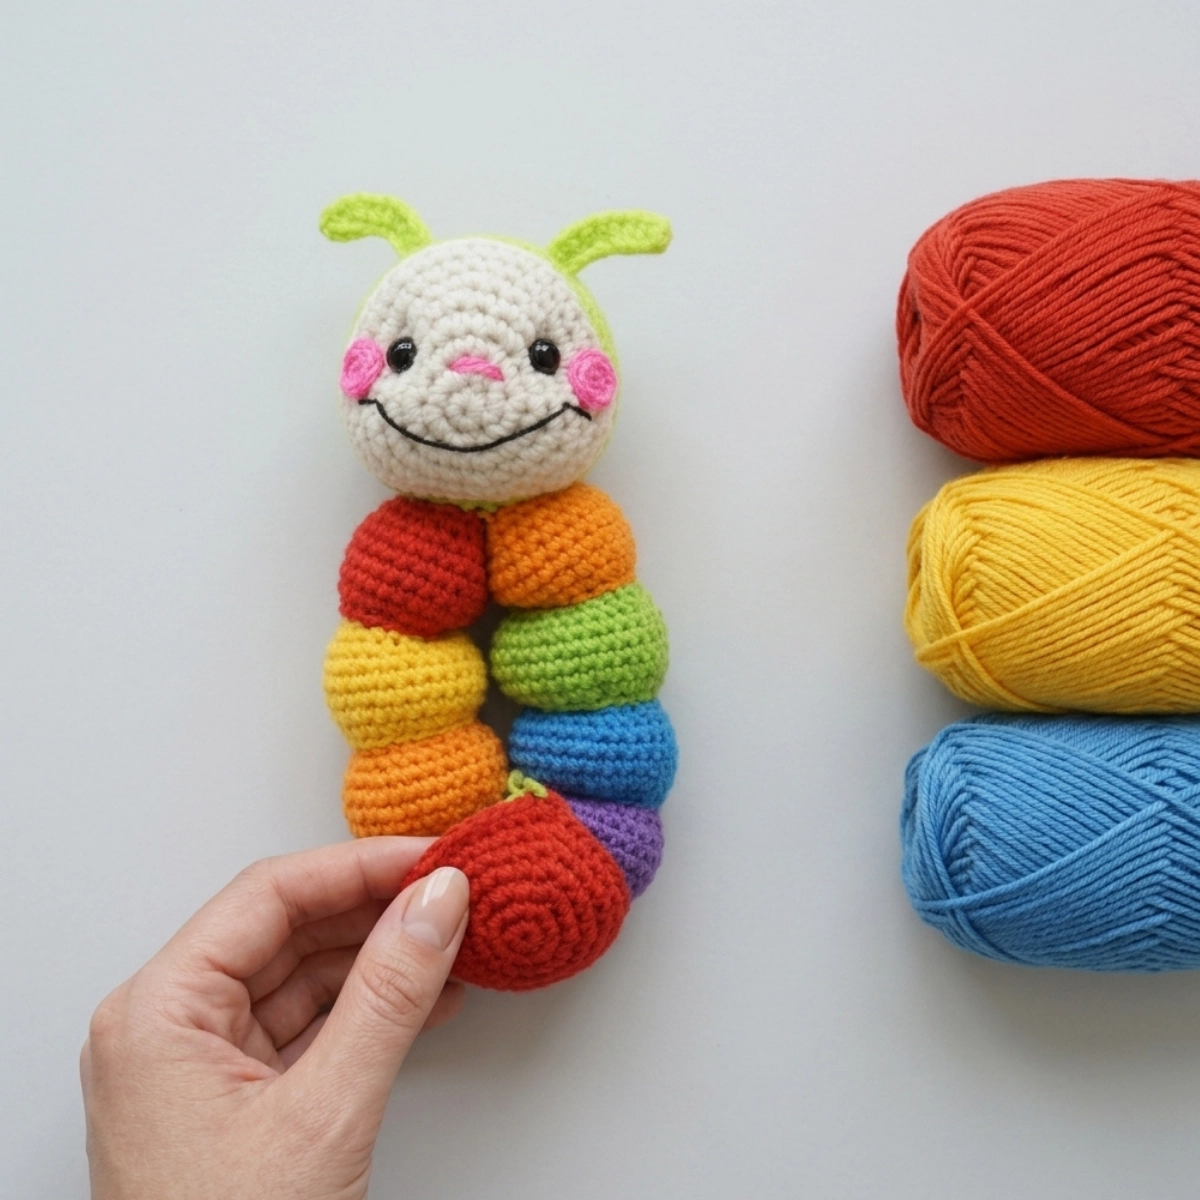
This free crochet caterpillar amigurumi pattern is one of my favorite makes recently. He’s rainbow-colored, roly-poly, and just the right amount of quirky. The body is worked as one continuous piece, so there’s no tedious sewing of individual balls together. That alone made this project so enjoyable from start to finish.
Why You’ll Love This Caterpillar Amigurumi Pattern
- No body assembly headaches. The entire body is crocheted in one continuous piece with color changes built right in. You just stuff and go.
- Scrap-yarn friendly. This free pattern uses seven different colors, which makes it a perfect stash buster if you’ve got small amounts of worsted weight yarn sitting around.
- Great for beginners. If you know single crochet, increase, and decrease, you can make this. The skill level is easy and every round is straightforward.
- Makes a wonderful handmade gift. It finishes at 8 inches long and 6.5 inches tall, making it a solid, squeezable size that kids absolutely love.
- The face shaping technique is a game-changer. The method used to indent and shape the face gives this caterpillar so much character without needing any special tools.
Yarn and Materials for the Caterpillar Amigurumi
I used a medium weight (size 4) worsted yarn for this project, and it gave the finished amigurumi great body and structure. The colors are vivid and cheerful next to each other, and the cream works beautifully for the face, arms, and legs.
Here’s everything you’ll need:
- Yarn: Medium / Worsted Weight (Size 4) in the following colors:
- Cream
- Green
- Red
- Yellow
- Orange
- Blue
- Pink
- Purple
- Crochet Hook: 4mm
- Safety Eyes: 12mm (x2)
- Tapestry needle
- Black embroidery thread (for the smile)
- Scissors
- Polyfill stuffing
- Hot glue (for the cheeks, optional)
- Stitch markers (x2, for eye placement)
Sizing and Gauge
This caterpillar finishes at 8 inches long and 6.5 inches tall from head to top of body. Since this is an amigurumi, getting a firm, tight gauge matters more than hitting an exact stitch count. You want your stitches close enough together that the stuffing doesn’t peek through. If your tension is loose, drop down to a 3.5mm hook. If it’s too tight to work comfortably, go up to a 4.5mm.
There is no official gauge swatch for this pattern. Just make sure your fabric feels firm and the stitches are snug.
- Finished Length: 8 inches
- Finished Height: 6.5 inches (head to body)
- Hook: 4mm
- Yarn Weight: Medium / Worsted (Size 4)
- Skill Level: Easy
Key Pattern Details at a Glance
- Finished size: 8″ long, 6.5″ tall
- Hook size: 4mm
- Yarn weight: Worsted / Medium (Size 4)
- Skill level: Easy
- Construction: Crocheted in the round, body worked in one continuous piece
- Safety eyes: 12mm
How to Adjust the Size
Want a smaller caterpillar? Try a fingering weight yarn with a 2.5mm or 3mm hook. Your finished size will come out roughly 40-50% smaller. Want a bigger version? Use bulky yarn with a 6mm hook and you’ll get a chunkier, larger toy. The construction stays exactly the same regardless of yarn weight.
Crochet Abbreviations (US Terms)
This pattern uses US crochet terminology throughout.
- sc = single crochet
- inc = increase (2 sc in the same stitch)
- dec = invisible decrease (insert hook through front loops of next 2 sts, yarn over and pull through, yarn over and pull through 2 loops)
- hdc = half double crochet
- hdc dec = half double crochet decrease (yarn over, insert into next st, yarn over pull through; yarn over, insert into following st, yarn over pull through; yarn over pull through all 5 loops)
- ch = chain
- st = stitch
- BLO = back loop only (insert hook through the back loop of the stitch only)
- MR = magic ring (adjustable loop start)
- sl st = slip stitch
How to Crochet the Caterpillar Amigurumi — Step-by-Step Pattern
Head
Start in cream yarn.
Round 1: 6 sc into a MR (6) Round 2: Inc all around (12) Round 3: Inc, sc in next st all around (18) Round 4: Inc, sc in next 2 st all around (24) Round 5: Inc, sc in next 3 st all around (30)
Place a stitch marker in the 15th stitch and another in the 25th stitch. These mark the eye positions. You’ll replace the markers with 12mm safety eyes later.
Round 6: Inc, sc in next 4 st all around (36) Rounds 7-8: Sc all around (36) Round 9: Change to green. Working in the BLO, sc all around (36)
Attach the 12mm safety eyes to the marked stitches now.
Rounds 10-14: Sc all around (36)
Note: Skip Rounds 15-19 as written in some versions of the pattern. Working them creates an unintentionally elongated head. Go straight to Round 20 after completing Round 14.
Round 20: Dec, sc in next 4 st all around (30) Round 21: Dec, sc in next 3 st all around (24)
Stuff the head firmly now. Keep stuffing after each remaining round.
Round 22: Dec, sc in next 2 st all around (18) Round 23: Dec, sc in next st all around (12) Round 24: Dec all around (6)
Fasten off, leaving a long tail. Sew the hole closed but do not cut the yarn yet. You’ll use this tail to sew the head onto the body.
Antenna Right
In green yarn.
Row 1: Ch 9. Hdc in the 2nd ch from hook. Hdc in next 3 st, 2 hdc in next st, hdc in next 3 st. (9 sts)
Fasten off, leaving a long sewing tail. Pin to the right side of the head and sew on. Weave in ends.
Antenna Left
In green yarn.
Row 1: Ch 10. Hdc in the 2nd ch from hook. Hdc in next 3 st, hdc dec 1 time, hdc in next 3 st. (8 sts)
Fasten off, leaving a long sewing tail. Pin to the left side of the head and sew on. Weave in ends.
Cheeks (Make 2)
In pink yarn.
Round 1: 6 sc into a MR (6)
Fasten off, leaving a long tail. Sew or hot glue the cheeks onto the face where you’d like them. Weave in ends.
Face Shaping
In cream yarn.
Thread a long piece of cream yarn onto your tapestry needle. Insert the needle up through the bottom of the head. Pull it out just to the right of the right eye. Re-insert just to the left of the right eye. Pull out one stitch left of where you first entered. Re-insert one stitch to the right. Now pull out to the right of the left eye. Re-insert to the left of the left eye. Pull out through the original entry point at the bottom. Hold both yarn ends and pull them at the same time to cinch and shape the face. Tie firmly and bury the knot inside the head. Cut excess yarn.
Embroider the nose in pink yarn now using a simple satin stitch in the center of the face.
Smile
In black embroidery thread.
Insert the needle from the right side of the face. Re-insert at a downward angle toward the center. Pull the needle out at the middle of the face, making sure the needle passes ABOVE the thread. Re-insert at the same center spot, this time passing BELOW the thread. Pull the needle out at the left side of the face, mirroring where you started on the right. This creates a curved, natural-looking smile. Fasten off and bury the thread ends inside the head.
Body
Start in red yarn.
Round 1: 6 sc into a MR (6) Round 2: Inc all around (12) Round 3: Inc, sc in next st all around (18) Round 4: Inc, sc in next 2 st all around (24) Round 5: Inc, sc in next 3 st all around (30) Round 6: Inc, sc in next 4 st all around (36) Rounds 7-13: Sc all around (36) Round 14: Dec, sc in next 4 st all around (30) Round 15: Dec, sc in next 3 st all around (24) Round 16: Dec, sc in next 2 st all around (18)
Round 17: Change to orange. Inc, sc in next 2 st all around (24) Round 18: Inc, sc in next 3 st all around (30) Round 19: Inc, sc in next 4 st all around (36) Rounds 20-26: Sc all around (36) Round 27: Dec, sc in next 4 st all around (30) Round 28: Dec, sc in next 3 st all around (24) Round 29: Dec, sc in next 2 st all around (18)
Stuff this section firmly now.
Round 30: Change to green. Inc, sc in next 2 st all around (24) Round 31: Inc, sc in next 3 st all around (30) Round 32: Inc, sc in next 4 st all around (36) Rounds 33-39: Sc all around (36) Round 40: Dec, sc in next 4 st all around (30) Round 41: Dec, sc in next 3 st all around (24) Round 42: Dec, sc in next 2 st all around (18)
Stuff this section firmly now.
Round 43: Change to blue. Inc, sc in next 2 st all around (24) Round 44: Inc, sc in next 3 st all around (30) Rounds 45-50: Sc all around (30) Round 51: Dec, sc in next 3 st all around (24) Round 52: Dec, sc in next 2 st all around (18) Round 53: Dec, sc in next st all around (12)
Stuff this section firmly now.
Round 54: Change to purple. Inc, sc in next st all around (18) Round 55: Inc, sc in next 2 st all around (24) Rounds 56-60: Sc all around (24) Round 61: Dec, sc in next 2 st all around (18) Round 62: Dec, sc in next st all around (12)
Stuff this final section firmly now.
Round 63: Dec all around (6)
Fasten off, leaving a long tail. Weave in ends and cut excess.
Place the head onto the body opening and sew it on securely using the tail you left at the head.
Legs (Make 6)
In cream yarn.
Round 1: 6 sc into a MR (6) Round 2: Inc all around (12) Rounds 3-5: Sc all around (12) Round 6: Dec all around (6)
Fasten off, leaving a long tail. Stuff each leg firmly. Sew the opening closed. Pin the legs along the underside of the body and sew on securely. Three legs on each side. Weave in ends.
Arms (Make 2)
In cream yarn.
Round 1: 6 sc into a MR (6) Round 2: Inc all around (12) Rounds 3-4: Sc all around (12) Round 5: Change to yellow. Working in the BLO, sc all around (12) Rounds 6-13: Sc all around (12)
Fasten off, leaving a long tail. Stuff the arms, but go light on stuffing in the last few rounds. This helps the arms drape naturally against the body instead of sticking out stiffly. Pin the arms to both sides of the body near the head and sew on. Weave in ends.
Your caterpillar is complete and ready to brighten someone’s day as a handmade gift or a cozy little friend to keep on the shelf.