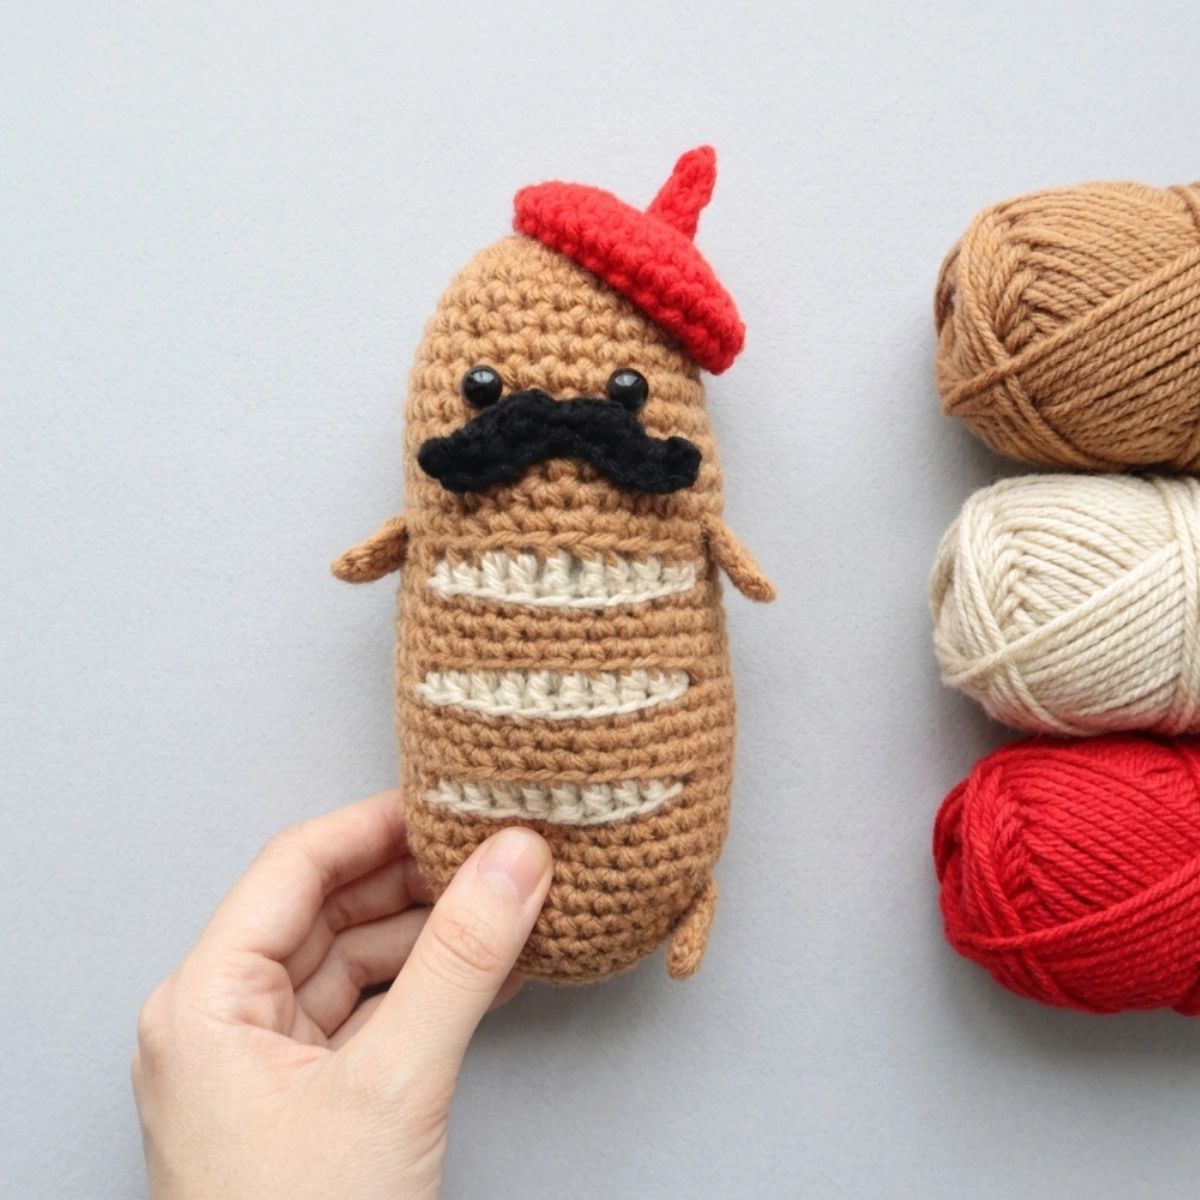
I was staring at a loaf of French bread one day and thought, this would make the cutest amigurumi. So I grabbed my hook and yarn, and this little guy was born. This French bread amigurumi crochet pattern is easy to work up and honestly so fun to make. He comes complete with a little red hat and a dapper mustache, which makes him look like the fanciest baguette you have ever seen. If you love making food amigurumi, this one is sure to bring a smile to everyone who sees it.
Materials and Tools
- Worsted weight yarn (size 4 / medium) in brown, cream, red, and black
- 4mm crochet hook
- 10mm safety eyes (1 pair)
- Tapestry needle
- Scissors
- Polyfill stuffing
- Hot glue gun and glue sticks
Gauge and Finished Size
This French bread amigurumi works up to approximately 7 inches tall and 3 inches wide. Gauge is not critical for this project as long as your fabric is tight enough to hold the stuffing inside.
Pattern Notes
This pattern is rated easy and works up fairly quickly. You will crochet in continuous rounds unless otherwise stated. Use a stitch marker to keep track of the beginning of each round. The bread loaf body has a cream section that creates the look of the sliced interior, which is achieved by changing colors and working in the back loops only (BLO) for certain rounds. The hat and mustache are made separately and attached at the end. Hot glue works best for the mustache, but you can also sew it on if you prefer.
Abbreviations
- MR = Magic Ring
- Sc = Single crochet
- Hdc = Half double crochet
- Dc = Double crochet
- Trc = Treble crochet
- Inc = Increase (2 sc in same stitch)
- Dec = Decrease (invisible decrease)
- SlSt = Slip stitch
- BLO = Back loops only
- Ch = Chain
- St = Stitch
Pattern Instructions
Bread Body
In Brown Yarn
Round 1: 6 Sc into a Magic Ring (6)
Round 2: *Inc* all around (12)
Round 3: *Inc, Sc in the next st* all around (18)
Round 4: *Inc, Sc in the next 2 st* all around (24)
Rounds 5 to 7: *Sc* all around (24)
Round 8: *Inc, Sc in the next 3 st* all around (30)
Round 9: *Sc* all around (30)
Place a stitch marker in the 13th and 17th stitch of Round 9. These are where your safety eyes will go. You can use a contrasting yarn or a different colored stitch marker to make them easy to spot.
Rounds 10 to 14: *Sc* all around (30)
Add safety eyes into the marked stitches now before continuing.
Round 15: Sc in the next 12 st. Change to cream. Working in the BLO, Sc in the next st, Hdc in the next st, Dc in each of the next 2 st, Trc in each of the next 2 st, Dc in each of the next 2 st, Hdc in the next st, Sc in the next st. Change to brown and working in BOTH loops, Sc in the next 8 st (30)
Round 16: Sc in the next 12 st. Working in the BLO, Sc in the next 10 st. Working in BOTH loops, Sc in the next 8 st (30)
Rounds 17 to 18: *Sc* all around (30)
Round 19: Sc in the next 13 st. Change to cream and working in the BLO, Sc in the next st, Hdc in the next st, Dc in each of the next 2 st, Trc in each of the next 2 st, Dc in each of the next 2 st, Hdc in the next st, Sc in the next st. Change to brown and working in BOTH loops, Sc in the next 7 st (30)
Round 20: Sc in the next 13 st. Working in the BLO, Sc in the next 10 st. Working in BOTH loops, Sc in the next 7 st (30)
Round 21: Sc in the next 14 st. Change to cream and working in the BLO, Sc in the next st, Hdc in the next st, Dc in the next 2 st, Trc in the next 2 st, Dc in the next 2 st, Hdc in the next st, Sc in the next st. Change to brown and working in BOTH loops, Sc in the next 6 st (30)
Round 22: Sc in the next 14 st. Working in the BLO, Sc in the next 10 st. Working in BOTH loops, Sc in the next 6 st (30)
Rounds 23 to 27: *Sc* all around (30)
Round 28: *Dec, Sc in the next 3 st* all around (24)
Round 29: *Sc* all around (24)
Round 30: *Dec, Sc in the next 2 st* all around (18)
Stuff the bread firmly at this point. Keep stuffing lightly after each remaining round as you close up.
Round 31: *Sc* all around (18)
Round 32: *Dec, Sc in the next st* all around (12)
Round 33: *Dec* all around (6)
Finish off, leaving a long tail. Sew the remaining stitches closed and weave in your ends. Trim any excess yarn.
Hat
In Red Yarn
Round 1: 6 Sc into a Magic Ring (6)
Round 2: *Inc* all around (12)
Round 3: *Inc, Sc in the next st* all around (18)
Round 4: *Inc, Sc in the next 2 st* all around (24)
Rounds 5 to 7: *Sc* all around (24)
Round 8: *Dec, Sc in the next st* all around (16)
Finish off, leaving a long tail. Pin the hat on top of the bread as shown and sew or hot glue it in place. Weave in ends and trim any excess yarn.
Hat Tip
In Red Yarn
Row 1: Ch 4. Sc in the 2nd Ch from the hook, Sc in the next 3 Ch.
Finish off and pin to the top of the hat. Sew on securely. Weave in ends and trim any excess yarn.
Mustache
In Black Yarn
Row 1: Ch 15. Sc in the 2nd Ch from the hook. Dec 2 times. Hdc 2 times in the next st, SlSt in the next 2 st, Hdc 2 times in the next st, Dec 2 times, Sc in the next st (12)
Finish off. Pin the mustache onto the bread below the safety eyes and hot glue it on, applying glue only to the middle section of the mustache. This keeps the ends free and gives it that curly, fancy look. Weave in ends and trim any excess yarn.
Tips
Stuffing the bread firmly is really important for this pattern. A well-stuffed amigurumi holds its shape much better and looks more polished in the end. I always stuff as I go once I start the decrease rounds rather than waiting until the very end.
The cream color change sections in rounds 15, 19, and 21 are what give this little guy his signature baguette look. Take your time with those rows. The BLO stitches on the follow-up rounds give a raised effect that really adds to the texture.
For the mustache, hot glue is genuinely the easiest option here. Gluing only the center keeps the ends slightly lifted, which makes it look far more dramatic and charming. If you prefer to sew everything, that works too, just use a few anchoring stitches at the center and tips.
If you want to add little arms and legs to your French bread amigurumi, several crafters in the comments have had great success using a couch potato arm and leg pattern as an add-on. It is not included in this pattern but it is a fun customization if you want to take it further.
Frequently Asked Questions
What yarn weight is used for this French bread amigurumi pattern? This pattern uses worsted weight yarn, which is a size 4 or medium weight yarn. It is one of the most common yarn weights and easy to find at any craft store.
What size crochet hook do I need for this pattern? You will need a 4mm crochet hook for this French bread amigurumi. If your stitches tend to be loose, you can try going down to a 3.5mm hook to keep the fabric tighter so the stuffing does not show through.
How big does this French bread amigurumi turn out? The finished French bread amigurumi measures approximately 7 inches tall and 3 inches wide. The size can vary slightly depending on your tension and yarn brand.
Is this pattern good for beginners? Yes, this is rated as an easy pattern. You will need to know how to make a magic ring, single crochet, increase, decrease, and basic color changes. If you are comfortable with those skills, you can make this pattern.
Can I sell items made from this pattern? The pattern itself is free for personal use. If you plan to sell finished items made from this pattern, it is a good idea to check the original designer’s terms on their website at stringydingding.com for the most up-to-date selling guidelines.
I share daily crochet inspiration on Pinterest. Save this article to your Pinterest boards so you can come back to it whenever you are ready to start.