I had so much fun making this snowflake amigurumi! It turned out so cute and is honestly one of my favorite holiday makes. This snowflake amigurumi crochet pattern is easy enough for beginners, and the finished plushie has the sweetest little face that makes it perfect for Christmas decor or gifting. You can also skip the stuffing and make just one piece to string into a garland. Either way, let’s get started!
Materials and Tools
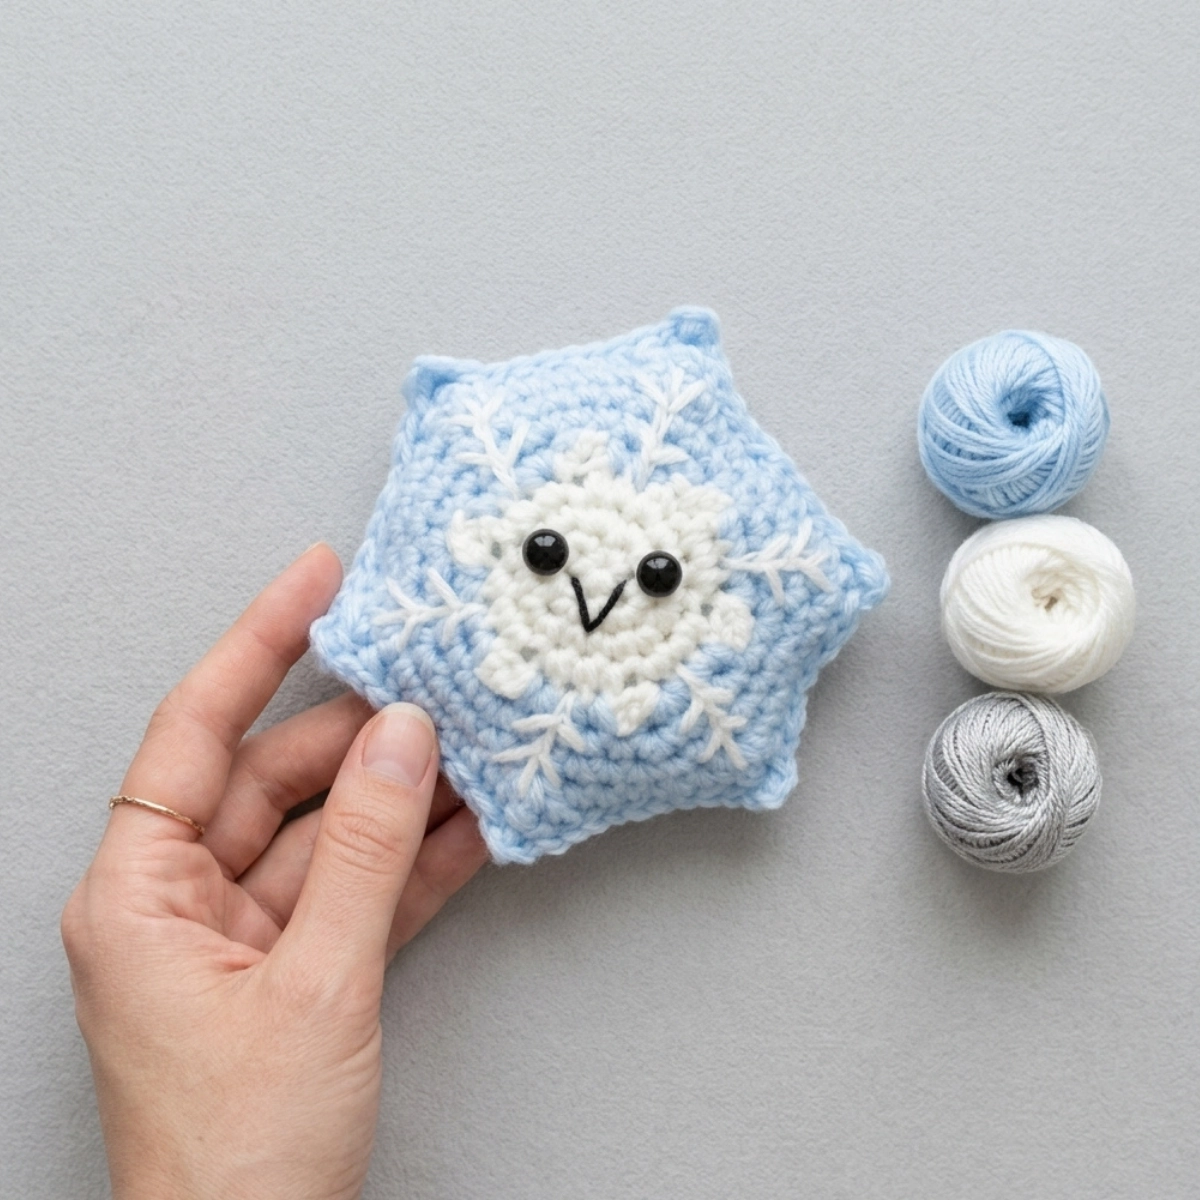
Here is everything you need to make this snowflake amigurumi:
- Yarn: Medium weight (Size 4) in white and blue
- 4mm crochet hook
- 8mm safety eyes
- Tapestry needle
- Black embroidery thread
- Scissors
- Stuffing
Gauge and Finished Size
The finished snowflake measures about 4.5 inches tall and 4 inches across. Gauge is not critical for this project, but using the recommended hook and yarn weight will get you close to this size.
Pattern Notes
This pattern is rated Easy. It is a great project if you are newer to amigurumi because the construction is straightforward. You will make two identical snowflake pieces and join them together at the end. The face is added to the front piece only.
You can use this pattern to make a stuffed plushie or a flat ornament. For the ornament version, just make one snowflake piece and skip the assembly step.
Abbreviations
- Sc: Single crochet
- Inc: Increase (2 sc in the same stitch)
- SlSt: Slip stitch
- Ch: Chain
- Dc: Double crochet
- Trc: Triple crochet
- St: Stitch
- MR: Magic ring
Special Stitches
Peak stitch (used during assembly): Sc in the next st, Ch 2, Sc in the 2nd Ch from the hook. This creates a small point along the outer edge when joining the two snowflake pieces together.
Pattern Instructions
Snowflake (Make 2)
Begin in white yarn.
Round 1: Work 6 sc into a magic ring. (6)
Round 2: *Inc* all around. (12)
After Round 2, attach your 8mm safety eyes. Space them 7 stitches apart. Only add the eyes to one of the two snowflake pieces. That will be your front piece.
Round 3: *Inc, Sc in the next st* all around. (18)
In the next round you will create the 6 white peaks of the snowflake. Each peak is made up of 3 stitches.
Round 4: *Sc in the next 2 st, Ch 3, Sc in the 3rd Ch from the hook. Sc in the next st* 6 times. (24)
You now have 6 white peaks on your snowflake. When you work the next round, you will only crochet into the middle stitch of each peak. Work regularly in all the other stitches.
Round 5: Change to blue yarn. *Inc, Sc in the next 3 st* all around. (30)
Round 6: *Inc, Sc in the next 4 st* all around. (36)
Round 7: *Inc, Sc in the next 5 st* all around. (42)
Now you will make the outer blue peaks. Work a sc in each stitch until you reach the middle point between two white peaks. At that middle point, work *Dc, Trc, Dc* all in the same stitch to create a peak. Continue with sc in each stitch until you reach the next middle point between peaks, and repeat. Work a blue peak at each of the 6 spots.
Fasten off and leave a tail for weaving in.
Make the second snowflake piece the same way, but do not add eyes to the second piece.
Embroidering the Smile
Thread a tapestry needle with black embroidery thread.
Insert the needle into the center area of the front snowflake piece. Pull the needle out to the left of the left eye. Reinsert the needle back into the center of the piece. Pull the needle out to the right of the right eye. Reinsert the needle into the center once more and pull it out nearby. Tie the thread ends into firm knots and tuck the knots inside the piece to hide them. Trim any excess thread.
Assembly
Hold both snowflake pieces together with the wrong sides facing each other. Make sure the stitches on both pieces are lined up.
Using blue yarn and your crochet hook, join the two pieces together by inserting your hook through both layers at once. Work as follows:
SlSt in each st around until you reach a peak. At the peak, work Sc in the next st, Ch 2, Sc in the 2nd Ch from the hook. Continue with SlSt in each st until you reach the next peak. Repeat making peaks at each of the 6 points as you join.
Before closing completely, stuff the snowflake lightly. Once stuffed, finish joining and fasten off. Weave in all ends.
Your snowflake amigurumi is done!
Tips
Weave in your ends as you go to save time at the end. When attaching the safety eyes, give them a firm push until you hear them click into place so they stay secure. If you want your snowflake to lie flatter, use less stuffing or skip the stuffing altogether for a decorative ornament version. For the garland version, simply make as many single snowflake pieces as you need and string them together with yarn.
Frequently Asked Questions
Is this snowflake amigurumi pattern suitable for beginners? Yes! This pattern is rated Easy and is a great beginner amigurumi project. As long as you know how to single crochet, increase, and work in the round, you can make this snowflake.
What yarn weight should I use for this snowflake amigurumi? This pattern uses medium weight (Size 4) yarn in white and blue. You can use any brand you like. A smooth yarn works best for amigurumi so your stitches look neat and even.
Can I make this snowflake as an ornament instead of a stuffed plushie? Absolutely. Just make one snowflake piece instead of two, skip the assembly and stuffing steps, and add a small loop of yarn at the top for hanging. It makes a sweet Christmas tree ornament.
What hook size do I need? This pattern uses a 4mm crochet hook. Using a smaller hook than recommended for your yarn helps keep the stitches tight so the stuffing does not show through.
How do I make the embroidered smile stay in place? The key is to pull the thread snugly as you stitch and tie firm knots at the end. Tuck the knot tails inside the toy before closing up. This keeps everything neat and secure.
I share daily crochet inspiration on Pinterest. Save this article to your Pinterest boards so you can come back to it whenever you are ready to start.